Saturday, August 22, 2015

When things go wrong -- you learn something new!

Good old Michael 4 himself ...
The actor: "Screentest, take two!"
(He's pinup size . Enjoy.)
LuxRender: an exterior noonday sun render:
Street scene in Mos Eisley. (Well, that's what it looks like!)
Byce 7 Pro:
A surreal arctic land/seascape with fog and glare
LuxRender: an exterior sunset render:
Sunset in the woods.
WTF?! An all night render, and
Lux gives me crap? Say, what?! And --
Problem could be inherent in the skinmap, because it has gobs of probs
even when you just attempt an old fashioned raytrace, Hmm. But --
LuxRender and a DAZ Studio raytrace of the 100% exact samemodel. You gotta be kidding!
Lovely detail rendering up in the street scene ... LuxRender. Nice.
Extreme closeup in low light ... also LuxRender. Nice!
There's an old saying that you learn a lot more when everything goes wrong than when it's all going smoothly. The old wisdom is absolutely spot on. It's been a long, long time since I had a render go catastrophically wrong and take two days to fix, but I guess you're never too smart to never have this happen!

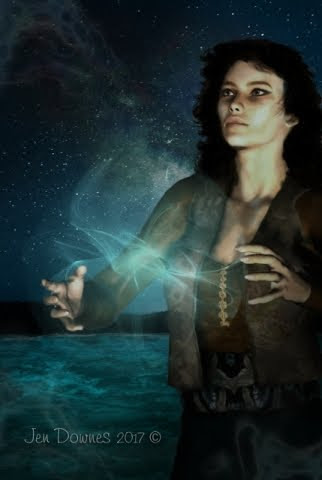
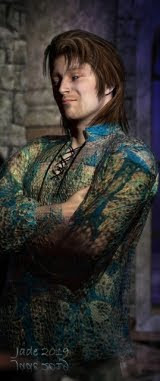
The other day I had a fancy to create a whole new Michael 4 character. Fact is, I'll be using the old M4 for a while longer at least, because I don't have a spare grand to invest in the Genesis 2 system and new Reality gear. So, if I'm going to be flirting with Michael 4 for the foreseeable future, why not have fun? Cool in theory. So ... okay, one new character coming up. Here's the idea: he's a young actor trying out for a part in a fantasy film. The original idea was to have "ooparts" in there somewhere ... like, a wristwatch, smartphone, camera. In fact, I never got that far!

A new face and phsyique (designed by self), new arrangement of an existing hairdo (Aether hair); one of the really nice skinmaps, with a very good venous map (JM Falcon for M4). Set it all up with a quick series of test renders in DAZ Studio, send it to LuxRender, and --

Urk.  The wheels came off utterly. There's something about this skinmap that Lux hates. I tried a dozen different things to get better results, all to no effect, by which time I was frustrated enough with the process to go right back to Studio and see what I could wring out of a raytrace. Set it up again, and --

Urk. The skinmap is glaring with highlights as if the model is coated up with a gallon of baby oil. I tried everything I know in the surfaces settings to fix this, with absolutely no result at all; and confess to being rather flummoxed. It's been a long time since I abandoned a render! Then, on a whim...

I went into the parameters for the lights. Not the skinmap. The lights. Selected "diffuse only," and did another test render. Well, now. That certainly cured the glaring highlights -- the only trouble being that the "diffuse only" render is so flat, the model now looks like he's wearing a thick coat of body makeup, that "bronzing mud" the catwalk models wear. Then inspiration struck.

The solution was to do two renders and blend them in Photoshop. One shot with the glaring highlights, t'other with the bronzing mud effect. Lay one over the other and fade 'em together till it's juuust right. Then, lay over a blue-gray cast to dial down the brilliant colors, plus a couple of "washes" in the margins of the shot to make them more interesting. Done!

So what you see here is "just" a raytrace, but if I do say so myself, it's a very nice on. Fact: it's way superior to a bad render from Lux. Sure, it ain't gonna  rival the photographic effects they'r getting with Michael 6, whom LuxRender appears to adore; but that's fine. Those days will come.

(Speaking of which, it was mentioned to me that I was "courageous," showcasing the cutting edge figures and art on the blog here, when I know I'm not competing. Courageous? Well, it's not a competition, is it?! And if it were, I know what it'll take to put me on the touchline in front of the Liverpool goal, with the goalie flat on his face twenty yards away. Anybody got a spare grand?! No, I haven't, either! Not right now, anyway.  Next year. Also, am thinking of the thousands of fantastic renders done over several years by great artists in Poser and Studio ... the fact is, if the photographic realism of the later Genesis models, added to the super-realism of the top-end plug-in render engines, will negate all that gorgeous art --! No way. That's not just wrong, it's daft. A great picture will always be a great picture.)

But what went wrong between this skinmap and LuxRender? Search me. I never did get it figured out. And it's not like I haven't used this skinmap before -- I have. A lot! Like ...

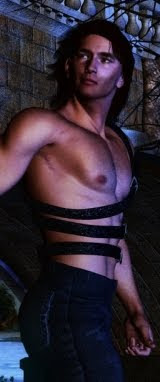
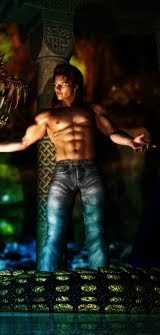
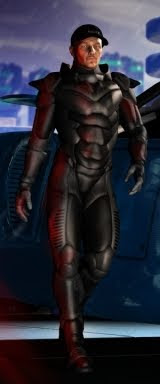
L-R, Gil Cronin and Joe Ramos, from the NARC series.
Inspired by, and courtesy of, Mel Keegan.
 ...this one, above, for a start -- posted Feb 15, 2012. Joe Ramos (a key supporting player from Mel Keegan's NARC series of novels) is wearing it. Swoon, am I right? It's a gorgeous skinmap. So what in the name of the patron saint of 3D artists went askew?! if anybody out there knows, drop me an email. You can still reach me at jade @ dream-craft (dot) com. I should mention, for the record, that since Dave and I officially left DreamCraft behind, the domain itself has passed into the hands of Mel Keegan.

Back to the drawing board! There's a lot more to learn about LuxRender ... and it's not to late to learn a thing or two about good old DAZ Studio itself. Experiments will commence, LOL.

Monday, August 17, 2015

Hiding out in the Giant's Cave ... sneaking a peek at Michael 6 ... and more

LuxRender plus DAZ Studio and Photoshop:
Hiding out in the Giant's Cave ... at Morialta!
An old snapshot, taken in 2006 and quite low-rez, provides
the perfect backdrop for the render.
First, raytrace some stone walls and vines on the left.
Second, LuxRender the figure alone, using the same lighting set
as was created for the cave raytrace...
Here's the raytrace test for the shot, which was used as a
map/guide for hand-painting the shadows...
Comparison of LuxRender and the raytrace. Why bother with
an overnight render ...?! You be the judge!
Hiding Out in the Giant's Cave is an idea that sprang to mind just a few days ago, and instantly I had a flash vision of what I wanted to use in the background. Winter of 2006, Dave and I went for a hike at Morialta Falls, and climbed up to the cave, which is set high in a cliff wall overlooking the gorge. The view is spectacular. Though the cameras way back then were low-rez by comparison with today's cameras, the pictures are striking. The weather can be awful at Morialta -- at least at the time of the year when the waterfall will be running. (This is Australia ... you want water in the falls? Then, it's been, or is, raining. Duh.) I remember, on this day in '06 it was drizzling half the time, and cold -- but very beautiful.

Anyway, there was your perfect white-sky backdrop, to which I added some rocks and vines at left, raytraced to complete the illusion of a cave mouth. The rocks are actually Nike Image's The Path, rotated through 90 degrees, and with a lot of heavy bump mapping. Easy to make the cave, and fast to raytrace --

But I hit a snag instantly. I couldn't get the props to load in Studio 4, which is my way of getting onto the Reality bridge across to LuxRender. And I didn't have a lot of time to fight with this, so I thought, "stuff it, render the figure separately, using the same lights, and put the whole thing together in Photoshop."

Which is what you see here. Picture #4 has the figure only. The alpha channel is turned ON in Reality, and -- come back tomorrow for a 3k-samples-per-pixel render. It's a lovely render, and the job of putting it all together was actually pretty simple. Just some touch-up work on the figure, where the mesh showed as a lot of triangles and pyramids (!), and then sky color, clouds, mist, birds, vines and so forth, which isn't a long job at all, using Photoshop brushes.

Am very pleased with the finished picture. You've seen this model before:

Also a Lux render, "the fugitive," from May 11, 2012
...it's the Atlas skinmap by SAV (from Renderosity), though the character face/body is one of mine -- and the above Lux render was the second time this guy had been revamped. Here's the original raytrace, also from May three years ago:


...and that's just about as far as you can drive a raytrace, with  a bunch of painting to make the most of highlights and so on. It's not bad at all ... but still, you can see why LuxRender is such a lure.

Speaking of things which are alluring ... I couldn't resist having a long, hard look at Michael 6, whis is, of course, the second generation Genesis male base figure.

This is what A$50 or so will get you these days:


...and of course, having put down the plastic for the new generation base figure, that's where you start shopping. Now, you want wigs, skin maps, costumes and morphs. So, might as well buy a bundle (link) that has the base figure and several of the above, for "only" about A$175...


And having committed to this upgrade, you're going to want the "mesh smoother morphs," which make the body ultimately malleable (link), able to be posed in any contortion, without the mesh buckling, which was always the problem with poor old Michael 4:


...and for an extra A$40 or so, the line between art/fantasy and reality really is blurring.

So, now you might as well go the whole hog, since you're in over two hundred bucks already, and also get the high-def, high-rez, hand-sculpted add-ons to Michael 6 (link), and be done with it:


...and this one, here ... darned if I can tell this 3D model from the real deal. So your shopping list is going to be the Michael 6 Pro Bundle, which gives you the base model plus a few wigs, a couple of skin maps, some poses and costumes; plus the Ultimate Natural for Michael 6 Body, to get the absolutely perfect body mesh; plus the Michael 6 HD Add-On --

And now you can start shopping for skin maps, toupees, costumes and so forth. As an educated guess, when I upgrade to Genesis 2, I'll need to drop about a grand, Aussie, to get my oars back in the water. Eep. Worth it? Oh, yeah ... when I have the bucks. Check this out:


...and there really is no answer to that! So, yes, of course I'll be going here.

Left: a render appearing over at DeviantArt ... Michael 5 (the precursor to 6) as poster-boy, pinup-boy. The artist has sadly only uploaded two renders, and nothing in years. But it's amazing what's being done with the Genesis figures, even without resorting to the top-end render engines. Have a look at this one, for example! Now, there's pretty. (And if I were a model working in the, uh, artistic category, I'd be starting to get worried, 'cause the stuff that's being done in that zone, with cutting-edge 3D models and the top-flight render engines, is rendering the human element obsolete! Interestingly, the "digital escort, or companion, idea is being toyed with -- pardon the pun -- right now. There's a story at Strange Horizons which is well worth a read: Kenneth: A User's Manual, by Sam J. Miller. Whoa.)

So, yes, of course I'll be upgrading . It's just a question of getting my hands on the cash and at the same time, having nothing pressing to do with it at the time! Right now, if I had a spare grand, well, upgrading software wouldn't be even close to the top of my agenda!

For the moment, I'm just going to chug along, doing what I'm doing -- which is actually having a lot of fun!

Wednesday, August 12, 2015

Similar setup, different lighting and method ... wow. And more. Of course.

LuxRender: Roald, lost in thought
DAZ Studtio 3: The Forest God, 2014 version
Bryce 7 Pro: atmospherics over a misty fjord
The raw render, right out of LuxRender, waiting for post work...
Background sky: a sunset about a year ago, from the driveway!
Post work: loads of painting in Photoshop.
Just a quick post today. Have been experimenting, but don't have a lot of time to do a looong post, and the way things are going, if I don't just get down to this and do it, it'll slither on another week before I can get it together. So -- I was really fascinated to work some more with the DAZ Studio raytrace you saw last time: the big question was, would the same set of lights work in Lux? Answer: yes, but. The picture would have been utterly different, though the physical elements (guy, chair, brazier, column, stairs...) were the same. Yes, I could have hammered it into a decent image, but inspiration struck.

I deleted everything except the guy and the chair, then imported a new set -- the Cloisters set, from the DAZ marketplace -- and shipped it into LuxRender, with just one light set, representing the sun at a low angle. Then began a fiddle of epic proportions. I couldn't get the lighting right, within Lux. This one fought me, fang and claw -- it's a long time since I've had a render stand up and fight this way, but eventually I got it. The beauty of LuxRender is, you can let the image "cook" overnight and then come back and fiddle with it in the morning.

Then ... choose a sky to match the brooding flavor of the image, as well as the low sun angle. Eureka! A sunset I photographed from the end of the driveway last year. Perfect. (Now you know why I never go anywhere without at least one camera in the bag or pocket.) Lastly, the part I've really come to enjoy. Post work used to be a chore, but I've started to enjoy painting for its own sake; and there's no dispute about it ... the raw render and the painted version are in different worlds.

The second picture for today is The Forest God, a new version done late last year -- a spin on the original idea  which was uploaded in Feb, 2013. (See the original, for comparison.) Once again, loads of painting on this ... and it's a simple raytrace in good ole DAZ Studio 3. I'd love to render this in Lux -- it has a few inherent problems that have put the job on the back burner, pending solutions.

The third image is a deceptively simple seascape in Bryce 7 Pro. The terrain and the water were dead easy. Then I turned on the atmospherics, and started fiddling about with clouds and haze and mist and sea fog. It's the atmosphere that takes forever to render in any of these landscape programs, and Bryce is no different. Mind you, the final result is well worth it! It ain't Vue, but it's not bad...

One day, I swear, I'll get into Vue. Have you SEEN what people are doing in Vue?! I could show you about a thousand images  that have been posted to various galleries and so on, but I'll just show you one. See this. That's typical of what you can do ... and I long to get into it. Drool, drool.

Friday, August 7, 2015

Visit a Gypsy camp in LuxRender, Bryce and DAZ ... and Smith Micro said to me --

LuxRender: Leon and Roald at the Gypsy camp.
(click to see all images at pinup size)
DAZ Studio raytrace painted in Photoshop:
Roald at the fireside
DAZ Studio raytrace in four "laminated" layers:
Meet Iphigenia ... at the Gypsy camp (Abraxas, Chapter 10)
Bryce 7 Pro: the ruined cenotaph beyond Esketh
Bryce 7 Pro: atmospherics and dawn light:
the foothills on the way into the Blue Mountains

Viewers/readers with somewhat long memories will know what they're looking at right here! Yep. I've been delving into The Forgotten Songs again, since the plot notes, which were lost for upwards of a year and a half (!) turned up unexpectedly. And --

Wow. Going back into Abraxas with the resources of LuxRender and Bryce 7 Pro puts a whole new spin on this stuff. Check out this closeup out at full size, guys (it's 1000 pixels wide), even if you don't click to see the leader shot at full size:


Now, that's LuxRender for you, and I'm impressed. It's 90% of the way to a photograph ... like a still from a movie that doesn't exist. 


-- the render is high-rez enough for the venous map in the hand to show. I usually slap on a venous map, but you often don't see it. The map is a bump map (or displacement map, if you want to go that far) which raises the patterns of the veins in torso, hands, arms, so forth, for an added layer of realism. It's great to see this tiny detail in a render; like the wrinkles in the knuckles, too.

The third render for today -- where you meet Iphigenia (you've actually seen her before ... yep, that's Iphigenia in the underground with Leon, in the intense heat and humidity; ergo, a lotta skin, which is pretty typical of fantasy! (Have you noticed how, in movies, guys are dressed from neck to ankles while gals are flitting around in teeny little costumes? Either he's dying of heat stroke in those clothes, or she's freezing! Anyway, that's Hollywood for you, right?) Where was I? Ah yes --

The third render for today, the big scene at the Gypsy camp with all three characters, is a composite shot. It's actually FOUR renders laminated/layered together, starting with an old Bryce skyscape as the bottom layer, and ending up with the foreground vegetation rendered separately:


You start out with a Bryce sky and use his as the backdrop for a dead-simple background image rendered in DAZ Studio (hint: this can be low-rez; not even raytraced -- doesn't need to be). The shot was done at 3000 x 2000 pixels, shipped into Photoshop, blurred, painted, color balanced etc. Then it was shipped back into DAZ Studio to be used as the background for the middle-ground subjects: two Michael 4s and a Victoria 4, with character morphs, wigs, skin maps and costumes, plus a gypsy wagon (the proper name for which is vardo, incidentally...) and the campfire. Only three lights were set and the scene was raytraced ...which took about seven HOURS, just to render this middle ground. The render was sent to Photoshop to be tweaked and painted; then it was shipped back into DAZ Studio, where it was used as the backdrop for the foreground trees, bushes and grasses. So you had a four-layer render, plus --


-- quite a bit of Photoshop painting with those special brushes, after the fact, to get the teeny little details in. Why would you do the image this way? Because it allowed me to do the whole shot in something like nine hours, including painting. If I'd set out to raytrace the entire scene, all of a piece, it'd have been a 20 or 30 hour render.

Maybe it's just me; do I not have the patience to spend 30 hours on an old fashioned raytrace?! Does anybody have the patience these days? Right now, if we invest that kind of time in something, we expect a LuxRender or Octane image (ie., a photographic result) at the end. Beacause ... wellll, with the best will in the world, if you compare a closeup of the three-character raytrace --

(please view full-size ... it's 1600 pixels wide)
-- with the LuxRender fidelity ... no contest. The raytrace is like storybook art. There's nothing wrong with it. But the stuff coming out of Lux and Octane is generations beyond.

Not long ago, raytracing was the be-all and end-all of 3D rendering on any "civilian" desktop; and when I started this blog, I couldn't even raytrace! If I tried, my Lenovo PC crashed right back to the desktop. Kaboom! Now, just a few years later, we look at a raytrace and wish for more! So --

Just for the fun of it, I tried an experiment, to see just how much one can squeeze out of a DAZ Studio 3 raytrace and some Photoshop painting:


In fact, it's not bad at all, what with the colored point lights, depth of field, and then a whole lot of Photoshop work in post. As artwork goes, it's actually pretty darned nice. But, being human, we're never satisfied, and what we want now is a photo, not a painting! So --

Imagine my joy to get the latest Smith Micro newsletter, entitled "The Future of Poser." Long story short: Poser Pro 11, probably due next year, will have a render engine very like Lux or Octane built in, in addition to the highly-respected Firefly render engine. Built in!! Yowzer. Guess where I'll very probably be going in 2016! The only thing that would keep me from going there would be ... oh, if DAZ Studio 5 came out with a decent interface leaving behind the Donald Duck interface we see in Studio 4, and then the new Reality/LuxRender version is indeed 7x faster, as promised. Then, yep, I'd stay with DAZ and Lux. But you gotta admit, the lure of Poser Pro with a built-in unbiased render engine and the much-vaunted Firefly engine ... it's soooo tempting. Like cherry cheesecake.