


click to see all images at 1000+ pixels...
At last, after trying since Boxing Day, I found an image I can't render! Well, I can render it, but I can't rayrace it. well, I can raytrace it, but it would take about 50 hours, which is an unrealistic amount of time, which is the same thing as not being able to render it. Take the figure out of the piece and concentrate on the garden. Yep, this is the one. Set it to raytrace with all that dappled sunshine, come back an hour later and it says 2%, or something along those lines. No can do. So this one is actually done with the old deep shadow map (as DAZ calls it; in Poser it's the shadow depth map or something ... same thing.)
It's a gorgeous little scene, complete with flowers, grasses, bushes, trees, textures on everything, and afternoon sunlight. I'd love to see what raytracing would do for it, but ... on 8 virtual cores (4 physical, threaded to work as 8) and 8GB of RAM, it ain't going to happen. Must get more memory. I wonder what 16 gigs would do for this? My motherboard will go up to, I think, 32 gigs Hmmm. Certainly, Dave needs to get more memory, very very soon. The work he's doing n Vue is amazing, and the program keeps telling him that it's waaay overloading his available resources.
So...


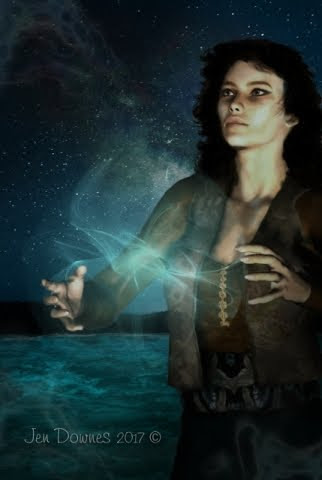
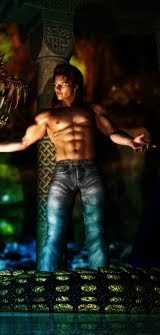
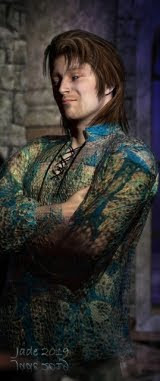
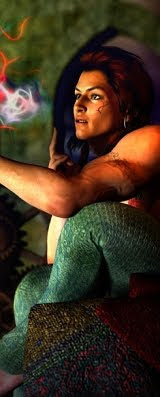
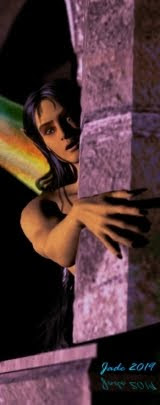
These three were dead easy, quick renders. What's the difference? No plants, no trees. Foliage (and hair, and fur) are where the loooong renders come in. This one? No sweat. The most creative thing about this little setup is the costume. It's actually the Witch Hazel top and the skirts and sashes from the Lilith Bikini, but I've been in there and replaced every texture. I put on a photo of a tablecloth -- a kind of damask fabric, on as the diffuse map (the one you actually see as an image slapped onto the object). I used the same image, dropped to grayscale and sharpened, as a bump map; and then I used a photo of a lace curtain, in grayscale, sharpened, as both the opacity map and the displacement map. The effect is very complex and attractive.
Bet she's freezing up on that battlement. Oh, well. One suffers for one's art.
I forget what the skinmap is (Jenna??), but this one is just the default, as it loads up, and it has some very nice response. I did try working with refraction and multiple colored lights on this one, but it made nooooo difference. So the only bit of post work you're seeing here is on the last of the three. The battlement is part of an enormous standing prop, and really only meant to be seen from a distance. However, if you overdrive all the bump maps to crinkle up the stone, you can get it to look pretty good ... the only thing you have to paint in, after the render, is the irregular edge of the stonework. If you care to notice, in the first two renders, the battlement in closeup has the appearance of a perfect box, no weathering, no coarseness in the stone -- all just perfect sharp edges --
Bet you were too busy looking at the young lady's charms to even notice, right? However, if you can drag your eyes away for long enough, notice the edge of the stone in the last render. Aha! It's been painted up to look like natural, coarse, weathered stone.
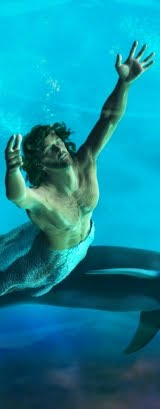
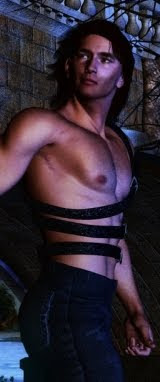
And speaking of working with skinmaps to get the most out of a somewhat reluctant render engine ... I ran the last project through a series of experiments that brought two of them up like this:


On the third one, nothing I did made any shred of difference, but on these, playing around with the refraction (as clearly distinct from reflection), got a lot more response out of the render. Check this out, at 1:1 size:

...and that's close to the luminosity I was after. The weird thing is, when you change the refraction on ONE object in your scene (in this case, the human figure, obviously), the lighting changes right across the whole scene. It's the oddest thing you ever saw. Change the refraction on him, and the background goes dark, even though the lights stayed the same. I have less than no clue why this happens, so these shots were recomposited in Photoshop to use the original backgrounds and the re-refractioned figure (and yes, I know there's no such word).
Really, really nice results ... but it took a looooong time. Will have to save these extra-complex renders for projects that are sobbing and begging for them.
Jade, March 3